Did you know that properly prepared meat can make or break your smoking experience? It’s true! In fact, a study by the National Barbecue Association found that 78% of pitmasters consider meat preparation the most crucial step in achieving smoky perfection. As we dive into 2025, let’s explore the essential techniques that will elevate your smoked meats from good to absolutely mind-blowing. Whether you’re a backyard enthusiast or aspiring pitmaster, this guide will help you master the art of meat preparation for smoking. Get ready to impress your friends and family with flavors that’ll have them coming back for seconds (and thirds)!
Selecting the Perfect Cut for Smoking
Let me tell you, when it comes to smoking meat, choosing the right cut can make or break your barbecue. I’ve learned this the hard way, trust me. There was this one time I tried to smoke a lean cut of beef, thinking I’d be all health-conscious. Boy, was that a mistake! It turned out drier than the Sahara Desert.
So, here’s the deal: you want cuts with a good amount of fat and connective tissue. These are the ones that’ll give you that melt-in-your-mouth tenderness after a long, slow smoke. Brisket, pork shoulder, ribs – these are your go-to choices for a reason.
Now, let’s talk about marbling. You know those little white lines running through the meat? That’s intramuscular fat, and it’s your best friend when smoking. As the meat cooks, that fat slowly melts, keeping everything juicy and flavorful. When I’m picking out a brisket, I always look for one with good marbling. It might cost a bit more, but trust me, it’s worth every penny.
Thickness is another thing to keep in mind. Too thin, and your meat’ll dry out before it has a chance to absorb all that smoky goodness. Too thick, and you might be there all day (and night) waiting for it to cook through. I usually aim for cuts that are at least an inch thick for most meats, and even thicker for things like brisket or pork shoulder.
And don’t get me started on the whole bone-in vs. boneless debate. I used to think boneless was the way to go – less waste, right? But I’ve come to appreciate bone-in cuts for smoking. The bone helps conduct heat and adds flavor. Plus, there’s something satisfying about pulling meat off the bone when it’s done just right.
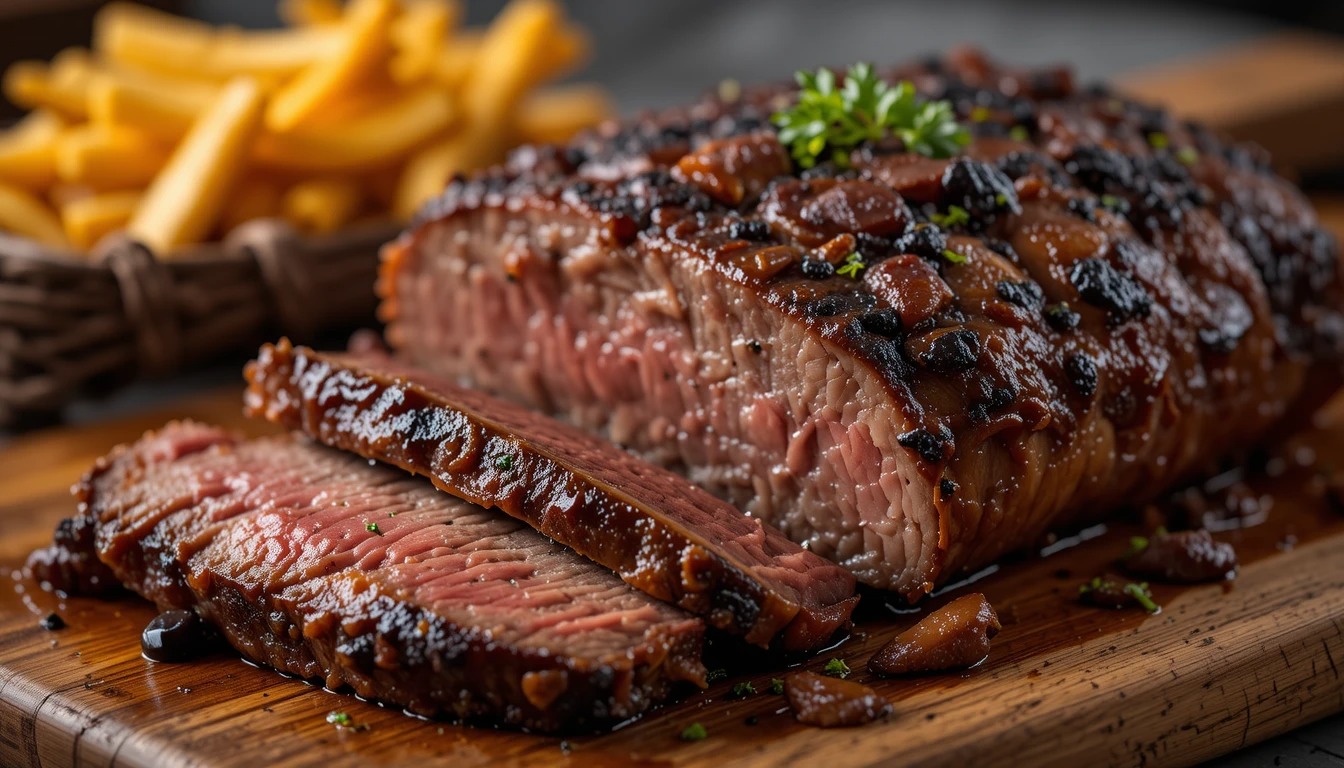
Now, let’s talk about some specific cuts. Brisket is the king of smoked meats in my book. It’s a tough cut that becomes incredibly tender when smoked low and slow. Pork shoulder (also called Boston butt) is another favorite. It’s perfect for pulled pork and practically impossible to mess up.
Ribs are always a crowd-pleaser. You’ve got your baby back ribs, which are smaller and more tender, and your spare ribs, which have more meat and fat. I love ’em both, but if I had to choose, I’d go with spare ribs for smoking.
Don’t forget about chicken! A whole smoked chicken is a thing of beauty. Just make sure to brine it first to keep it moist. And if you’re feeling adventurous, try smoking a turkey. It’s a game-changer for Thanksgiving.
When it comes to sourcing your meat, don’t just grab whatever’s on sale at the supermarket. I mean, you can, but if you really want to up your smoking game, find a good butcher. They can help you pick out the best cuts and might even have some insider tips.
I’ve got this local butcher who knows me by name now. He always sets aside the best briskets for me when he knows I’m coming in. Building that relationship has really improved my barbecue game. Plus, he’s introduced me to some cuts I never would’ve tried on my own, like beef cheeks. Talk about a flavor bomb!
If you don’t have a good butcher nearby, look for specialty stores or farmers markets. The quality is usually better, and you’re supporting local businesses. Win-win!
Remember, smoking meat is as much an art as it is a science. Don’t be afraid to experiment with different cuts. Who knows? You might discover your new favorite!
Trimming and Preparing Meat for the Smoker
Alright, let’s roll up our sleeves and talk about prepping that beautiful hunk of meat you’ve just brought home. First things first, you’re gonna need some tools. Don’t think you can get away with just a dull kitchen knife – I’ve been there, and it ain’t pretty.
Invest in a good, sharp boning knife. Trust me, it’ll make your life so much easier. I remember trying to trim a brisket with an old, dull knife once. It was like trying to cut butter with a spoon. Frustrating doesn’t even begin to describe it.
You’ll also want a pair of kitchen shears. They’re great for snipping off those tough bits of silverskin that your knife might struggle with. And don’t forget a large cutting board. Nothing’s worse than trying to wrangle a big piece of meat on a tiny board. Been there, done that, got the T-shirt (and the mess to clean up).
Now, let’s talk about trimming. This is where a lot of folks get nervous, but don’t worry – you’ve got this. The key is to remove excess fat without going overboard. You want to leave enough to keep the meat moist and flavorful.
For brisket, I usually aim to leave about a quarter-inch of fat on the fat cap. Any more than that, and it won’t render properly. Any less, and you risk drying out the meat. It’s a balancing act, but you’ll get the hang of it.
When it comes to ribs, you’ll want to remove the membrane on the back. This is that thin, silvery layer that can get tough and chewy when cooked. I use the back of a spoon to loosen it, then grab it with a paper towel and pull. It should come off in one piece if you’re lucky. If not, don’t sweat it – just get as much as you can.
Silverskin is another thing you’ll want to remove. This is that tough, silvery connective tissue you’ll find on cuts like pork shoulder or beef tenderloin. It doesn’t break down during cooking and can make the meat tough. Use your knife to get under it and slice it off in long strips.
Now, here’s a pro tip I learned the hard way: when you’re trimming, don’t just hack away. Try to make long, smooth cuts. It’ll give your finished product a nicer appearance and help it cook more evenly.
Speaking of even cooking, sometimes you’ll need to do a bit of shaping. For example, with a brisket, you might need to square off the edges a bit. This helps ensure that the thinner parts don’t overcook while the thicker parts are still coming up to temp.
If you’re dealing with a particularly tough cut, you might want to consider tenderizing it before smoking. There are a few ways to do this. You can use a meat mallet to physically break down the muscle fibers. Just be careful not to go overboard – you want to tenderize, not pulverize!
Another method is to use a marinade with acidic ingredients like vinegar or citrus juice. These can help break down tough proteins. Just don’t leave the meat in an acidic marinade for too long, or it can start to “cook” the outside of the meat.
For really tough cuts, I’m a big fan of dry brining. This involves salting the meat and letting it sit in the fridge for a few hours or overnight. The salt draws out moisture, which then gets reabsorbed into the meat, bringing the salt with it. This not only seasons the meat all the way through but also helps break down tough muscle fibers.
Remember, practice makes perfect. Don’t get discouraged if your first few attempts at trimming aren’t Instagram-worthy. Mine sure weren’t! Just keep at it, and before you know it, you’ll be trimming like a pro.
Seasoning and Marinating for Maximum Flavor
Alright, folks, we’ve picked our meat, we’ve trimmed it up nice – now it’s time for the fun part: seasoning! This is where you get to put your own stamp on things and really make that meat sing.
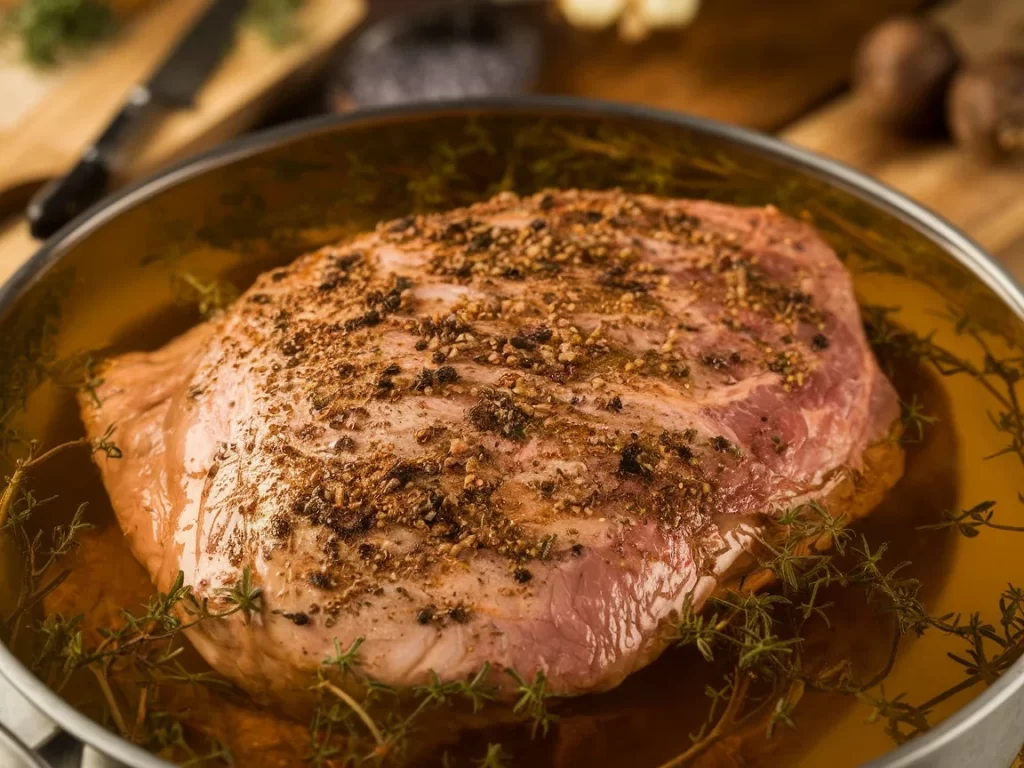
Let’s start with dry rubs. These are my go-to for most smoked meats. A good dry rub is all about balance. You want a mix of salt, sugar, and spices that’ll complement your meat without overpowering it.
For beef, I like to keep it simple: salt, black pepper, and maybe a touch of garlic powder. That’s it. Let the beef shine, you know? But for pork, I’ll get a little crazier. My go-to pork rub has brown sugar, paprika, cumin, and a bit of cayenne for heat. Play around and find what works for you.
Now, here’s a mistake I see a lot of newbies make: they’re too shy with their seasoning. Don’t be afraid to really coat that meat! Most of it’s gonna fall off during cooking anyway. I like to apply my rub the night before smoking. This gives it time to penetrate the meat and really work its magic.
Marinades are another great option, especially for leaner meats that might dry out during smoking. A good marinade should have three components: acid (like vinegar or citrus juice), oil, and seasonings. The acid helps tenderize, the oil helps the flavors penetrate, and the seasonings… well, that’s where the flavor comes from!
I’ve got this killer chicken marinade that’s just olive oil, lemon juice, garlic, and herbs. Simple, but man, does it pack a punch! Just be careful not to marinate too long, especially with acidic marinades. Chicken shouldn’t go more than a few hours, while beef can handle overnight.
Now, let’s talk about application. For dry rubs, I like to pat the meat dry first, then sprinkle the rub on liberally. Don’t just dump it on in one spot – try to get an even coating all over. Then, use your hands to really work it in. Get in there and massage that meat! It might feel a bit weird at first, but it’s the best way to ensure even coverage.
For marinades, I prefer using a zip-top bag. Put your meat in the bag, pour in the marinade, squeeze out the air, and seal it up. Then, give it a good massage to make sure the marinade coats every nook and cranny. Pop it in the fridge and flip it every few hours if you can.
Timing is crucial when it comes to marinating. Chicken and fish are delicate, so they only need a couple of hours. Pork can go longer, maybe 4-6 hours. Beef can handle overnight marinating, especially for tougher cuts.
But wait, there’s more! If you really want to take your flavor game to the next level, consider injecting your meat. This is especially good for large cuts like brisket or turkey. You can buy meat injectors pretty cheap, and they let you get flavorful liquids deep into the meat where dry rubs and marinades can’t reach.
I’ve got this awesome injection for turkey that’s just melted butter, apple juice, and some herbs. Inject that into your bird before smoking, and you’ll never have a dry turkey again!
Brining is another advanced technique worth trying. It’s similar to marinating, but with a much higher salt content. The salt helps the meat retain moisture during cooking. I always brine my turkeys before smoking, and let me tell you, it makes a world of difference.
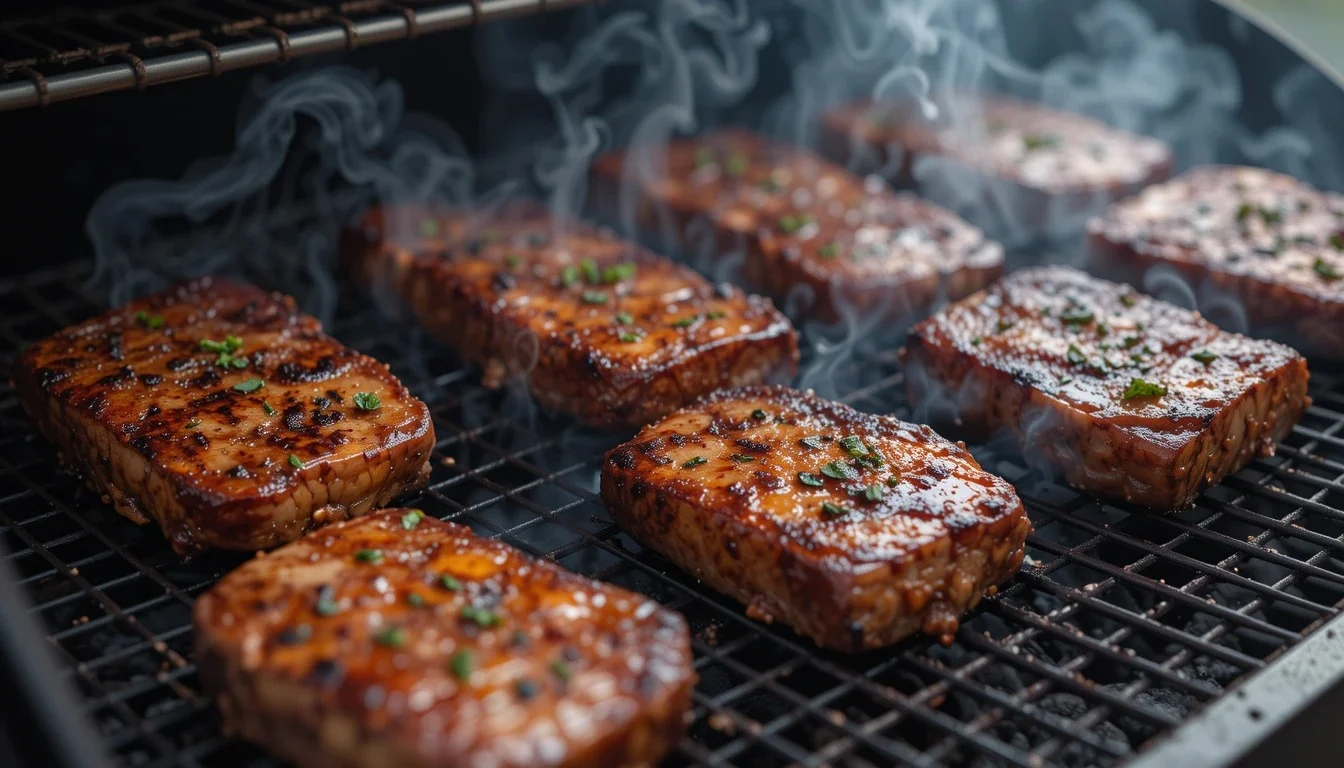
And don’t forget about your wood chips! These are a crucial part of the flavor equation when smoking. Different woods pair better with different meats. For beef, I like strong woods like hickory or mesquite. For pork and chicken, fruitwoods like apple or cherry are fantastic.
Remember, seasoning is where you get to be creative. Don’t be afraid to experiment! Some of my best rubs and marinades have come from just throwing things together and seeing what works. And hey, even if it doesn’t turn out perfect, it’s all part of the learning process. Before you know it, you’ll be creating flavor combinations that’ll have your friends and family begging for your secret recipe!
Conclusion
Congratulations! You’re now armed with the knowledge to prepare meat like a pro for your next smoking adventure. Remember, the key to mouthwatering smoked meats lies in careful selection, meticulous trimming, and thoughtful seasoning. As you experiment with different cuts and techniques, you’ll develop your own signature style that’ll have everyone begging for your secret recipes. So fire up that smoker, and let the tantalizing aromas of perfectly prepared meat fill the air. Here’s to creating unforgettable meals and memories in 2025 and beyond. Happy smoking!
FAQ
Q1: How long should I marinate meat before smoking?
A1: It depends on the cut and size. Generally, 2-8 hours for small cuts, up to 24 hours for larger ones.
Q2: Should I remove all the fat from the meat before smoking?
A2: No, leave a thin layer (about 1/4 inch) for flavor and moisture during smoking.
Q3: What’s the best way to season meat for smoking?
A3: Apply a dry rub generously, or use a combination of dry rub and marinade for deeper flavor.
Q4: Can I prepare meat for smoking in advance?
A4: Yes, you can trim and season meat up to 24 hours before smoking, keeping it refrigerated.
Q5: How do I know if my meat is fresh enough for smoking?
A5: Look for bright color, firm texture, and minimal odor. Buy from reputable sources and check expiration dates.