Mastering the Art of Smoking Large Cuts: A Flavorful Guide for 2024
Ah, the mouthwatering aroma of smoked meat! There’s nothing quite like it, is there? As we dive into 2024, the art of smoking large cuts has reached new heights. Did you know that according to a recent survey, 68% of BBQ enthusiasts consider smoking large cuts the ultimate test of their grilling skills? Well, buckle up, because we’re about to embark on a flavorful journey that’ll transform you from a novice smoker to a backyard pitmaster extraordinaire!
Essential Equipment for Smoking Large Cuts
Let me tell you, when I first started smoking large cuts of meat, I was like a kid in a candy store with all the equipment options. But boy, did I learn some lessons the hard way! Let’s break down what you really need to get smokin’.
Offset smokers vs. vertical smokers: Pros and cons
I remember the day I bought my first offset smoker. It was this beautiful, shiny beast that I just knew would make me the pitmaster of the neighborhood. And you know what? It did… eventually. But not before I spent countless hours trying to maintain consistent temperatures and battling uneven cooking.
Offset smokers are great for that authentic barbecue experience. They give you that classic side-fire box setup, which allows for excellent smoke flow across your meat. Plus, they look darn impressive in your backyard. The downside? They can be temperamental as all get-out. You’ve gotta babysit ’em, constantly adjusting vents and adding fuel to keep the temp steady.
Now, vertical smokers? They’re like the easygoing cousin of the offset. I picked one up a few years back, and let me tell you, it was a game-changer for my weeknight smokes. They’re more compact, easier to control, and use less fuel. The trade-off is that you might not get quite the same smoke flavor as an offset, and you’re limited on space for those really big cuts.
Here’s my two cents: if you’re just starting out or don’t have a ton of space, go vertical. But if you’re ready to dive deep into the art of smoking and have the time to master it, an offset can produce some truly stellar results.
Temperature control devices: Digital thermometers and probes
Okay, let’s talk temp control. This is where I made one of my biggest rookie mistakes. I thought I could eyeball it, you know? Just stick my hand in there, feel the heat, and know it was “about right.” Spoiler alert: I was dead wrong.
Investing in a good digital thermometer with multiple probes was a total lightbulb moment for me. Suddenly, I could monitor the smoker temp and the internal temp of my meat without opening the lid every five minutes (which, by the way, is a big no-no).
Look for a thermometer with at least two probes – one for the smoker temp and one for the meat. If you can spring for more probes, even better. I’ve got a four-probe setup now, and it’s like having a command center for my smoke. You can track different parts of large cuts or multiple pieces of meat at once.
And don’t cheap out here. A good thermometer is the difference between perfectly smoked meat and a tough, dry disaster. Trust me, I’ve had my fair share of the latter.
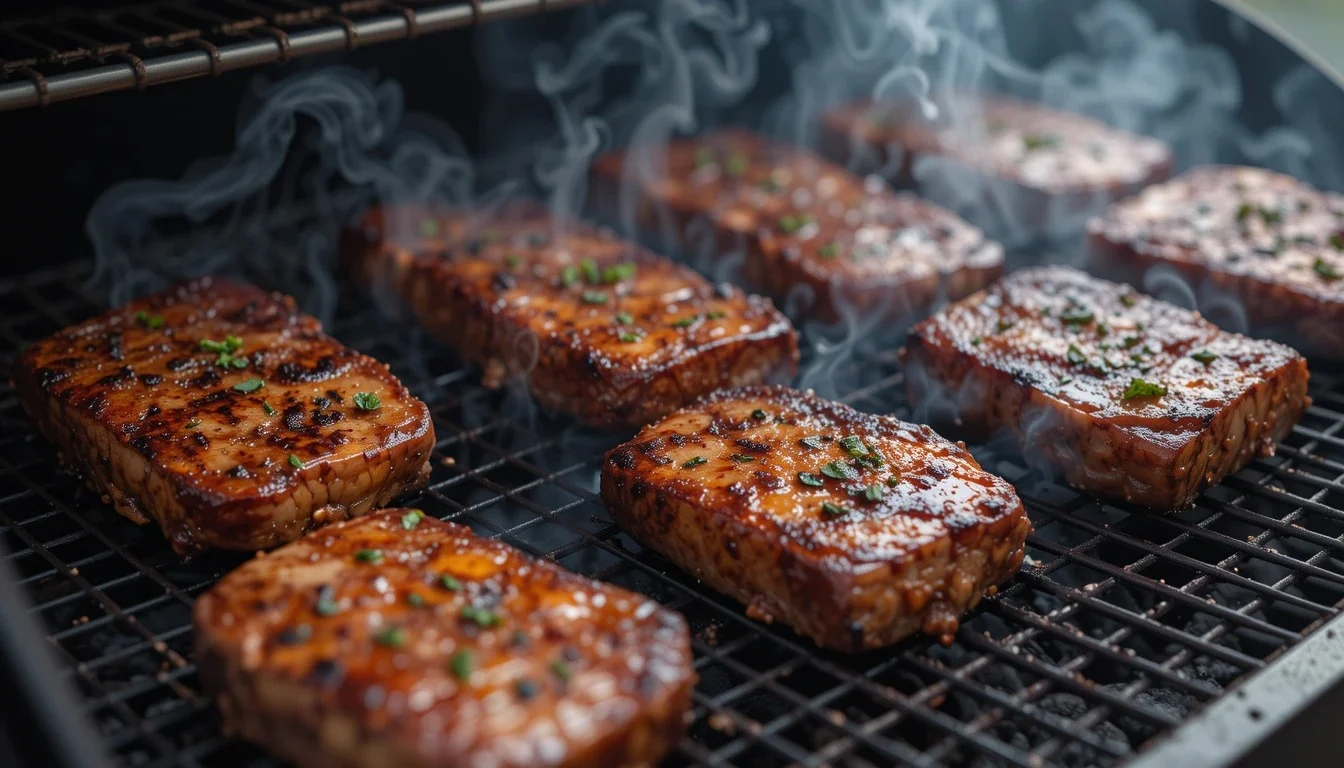
Wood selection: Best types for different meats
Alright, let’s chat wood. This is where you can really geek out and get creative. Different woods impart different flavors, and pairing them with the right meats can elevate your smoke from good to mind-blowing.
Here’s a quick rundown of my go-to woods:
- Hickory: This is your all-purpose superstar. Great with pork and beef, but can be a bit strong for poultry.
- Apple: Milder and slightly sweet. Perfect for pork and poultry.
- Mesquite: Strong and earthy. Use sparingly with beef, but be careful – it can overpower quickly.
- Oak: Another versatile wood. Works well with beef and pork.
- Cherry: Mild and fruity. Excellent with poultry and pork, and it gives a beautiful color to the meat.
I learned the hard way that more smoke isn’t always better. There was this one time I loaded up my smoker with mesquite for a brisket, thinking “more flavor, right?” Wrong. It tasted like I was chewing on a campfire. Now I know to use strong woods like mesquite sparingly, often mixed with milder woods for balance.
Accessories: Drip pans, meat injectors, and butcher paper
Now, let’s talk about the unsung heroes of smoking: the accessories. These little gadgets can make your life so much easier and your results so much better.
First up, drip pans. I can’t tell you how many times I’ve had to clean out my smoker because I didn’t use a drip pan. They catch all that delicious (but messy) fat and juice, keeping your smoker clean and preventing flare-ups. Plus, you can use those drippings to make an amazing sauce later.
Meat injectors were a game-changer for me, especially with larger cuts like brisket or turkey. They let you get flavor and moisture deep into the meat. I remember the first time I used one – it was like unlocking a secret level in a video game. Suddenly, my smokes were juicier and more flavorful than ever.
And don’t even get me started on butcher paper. I was a foil guy for years until a buddy introduced me to the wonders of butcher paper. It lets the meat breathe a bit more than foil, which helps develop that perfect bark while still protecting the meat from drying out. It’s especially great for brisket – that’s when I really saw the difference.
One last tip: invest in a good pair of heat-resistant gloves. Your hands will thank you, trust me. I’ve got the scars to prove why you shouldn’t try to manhandle hot meat with regular oven mitts.
Preparing and Seasoning Your Large Cuts
Alright, folks, now that we’ve got our gear sorted, let’s dive into the meat of the matter – literally! Preparing and seasoning your large cuts is where the magic really begins. This is where you set the stage for flavor town, and believe me, I’ve had my fair share of triumphs and face-palm moments in this department.
Trimming techniques for optimal smoke penetration
First things first: trimming. I used to think that more fat meant more flavor, so I’d leave every bit on. Big mistake. I ended up with rubbery exterior fat that didn’t render properly, and smoke that couldn’t penetrate the meat.
Here’s what I’ve learned: trim that fat cap down to about 1/4 inch thickness. This gives you enough fat to keep the meat moist and flavorful, but not so much that it becomes a barrier to that delicious smoke.
For brisket, I like to remove most of the hard fat on the point end. It won’t render out during cooking, and it’ll just prevent the seasoning and smoke from getting to the meat. Same goes for any silverskin on pork shoulders – that stuff is like a suit of armor against flavor.
One time, I got a little overzealous with my trimming and ended up with a brisket that looked like it had been through a weed whacker. Lesson learned: trim with purpose, not with abandon. You want to create a uniform shape that’ll cook evenly, not win a meat-carving contest.
Dry rub recipes and application methods
Now, let’s talk rubs. This is where you can really let your creativity shine. I’ve experimented with all sorts of rubs over the years, and I’ve found that simpler is often better. My go-to base is usually:
- 1/2 cup brown sugar
- 1/4 cup paprika
- 2 tablespoons black pepper
- 2 tablespoons salt
- 1 tablespoon garlic powder
- 1 tablespoon onion powder
From there, I’ll add in other spices depending on the meat and my mood. Cumin and chili powder for a Tex-Mex vibe, or maybe some rosemary and thyme for a more herbal profile.
When it comes to applying the rub, I used to just dump it on and rub it in. But I’ve found that patting it on gently actually helps it adhere better. And here’s a pro tip: apply your rub the night before and let that meat sit in the fridge overnight. It’s like a flavor spa day for your brisket or pork shoulder.
Brining and marinating: When and how to use these techniques
Brining and marinating are like the secret weapons in your flavor arsenal. I remember the first time I brined a turkey before smoking – it was a revelation. The meat was so juicy and flavorful, I thought I’d died and gone to poultry heaven.
For poultry and pork, a basic brine of 1 cup salt and 1/2 cup sugar per gallon of water works wonders. Throw in some aromatics like garlic cloves, peppercorns, and bay leaves, and you’re golden. Let it soak for about an hour per pound of meat.
Marinating is great for smaller cuts like chicken pieces or pork chops. I’ve got a killer marinade that’s just equal parts soy sauce, Worcestershire sauce, and apple cider vinegar, with some minced garlic and brown sugar thrown in. Let the meat soak for a few hours (or overnight for bigger pieces), and you’re in for a treat.
One word of caution: don’t brine or marinate for too long. I once left a chicken in brine for two days, thinking more time equals more flavor. Nope. It turned out so salty it was practically inedible. Stick to the recommended times, and you’ll be fine.
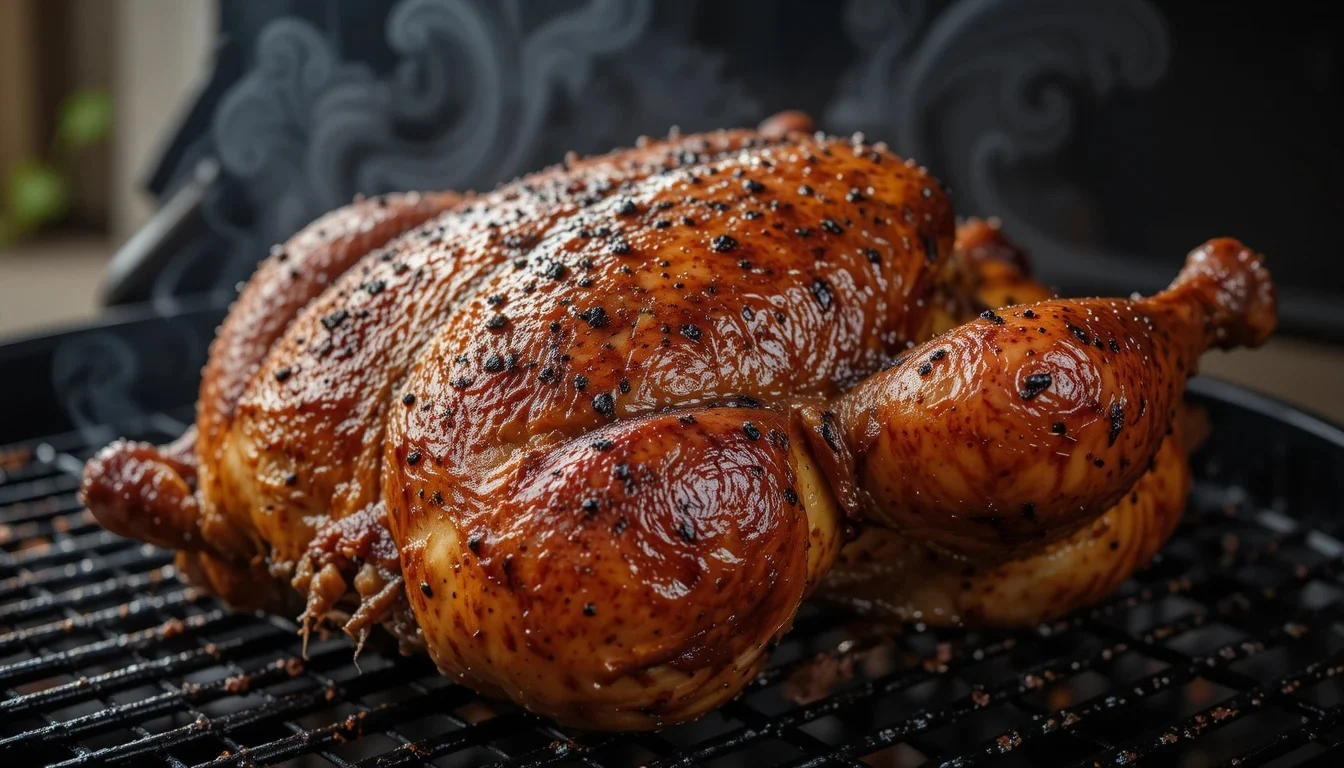
Tying and trussing for even cooking
Last but not least, let’s talk about tying and trussing. This might seem like an unnecessary step, but trust me, it can make a huge difference in how evenly your meat cooks.
For irregularly shaped cuts like pork shoulder, tying it up can help create a more uniform shape. This means more even cooking and a prettier final product. I use butcher’s twine and create a simple series of loops around the meat, tightening as I go.
Trussing is particularly important for poultry. It keeps the wings and legs close to the body, which helps everything cook evenly. Plus, it makes for a nicer presentation. I remember the first time I smoked an untrussed turkey – the wings spread out like it was trying to take flight, and they ended up dry and overcooked while the rest of the bird was perfect.
Here’s a quick trussing method I use: Lay the bird breast-side up, with the legs pointing towards you. Cross the legs and tie them together tightly. Then, run the string up to the neck, flip the bird over, and tie the wings down to the body. Flip it back over, and you’re good to go.
Remember, the goal here is even cooking. You want every bite to be as juicy and delicious as the last, not a rollercoaster of over and undercooked sections.
Smoking Techniques and Time Management
Alright, folks, we’ve prepped our meat, we’ve got our equipment ready, now it’s time for the main event: the smoke itself. This is where patience, attention to detail, and a little bit of pit master intuition come into play. Let me share some of the techniques I’ve picked up over the years – some through success, others through, shall we say, “learning experiences.”
Low and slow vs. hot and fast methods
The age-old debate: low and slow or hot and fast? Well, I’m here to tell you that both have their place in the smoker’s arsenal.
Low and slow is the traditional method, and it’s my go-to for most large cuts. We’re talking 225-250°F for anywhere from 8 to 16 hours, depending on the size and type of meat. This method allows the connective tissues to break down slowly, resulting in that melt-in-your-mouth texture we all crave.
I remember my first overnight brisket smoke. I was up every hour, checking temperatures, adding fuel, and generally being a nervous wreck. But when I finally sliced into that brisket the next day? Pure heaven. The meat was tender, juicy, and had that perfect pink smoke ring.
Now, hot and fast is a bit more controversial, but it has its advantages. This method cranks the heat up to around 300-325°F, significantly reducing cook time. It’s great for when you’re short on time or for smaller cuts that don’t need as much rendering.
I’ve had success with hot and fast on pork butts and even some briskets. The key is to really nail your temperature control and be vigilant about internal meat temp. It’s less forgiving than low and slow, but when done right, the results can be impressive.
Managing the smoke: Clean vs. dirty smoke
Now, let’s talk about smoke quality. This was a game-changer for me when I finally understood the difference between clean and dirty smoke.
Clean smoke is thin, blue, and barely visible. It imparts that perfect smoky flavor without any bitterness. Dirty smoke, on the other hand, is thick, white, and can leave your meat tasting like an ashtray.
I learned this lesson the hard way when I first started out. I thought more smoke meant more flavor, so I’d have my smoker billowing thick white clouds. The result? Meat that was so acrid it was practically inedible.
The key to clean smoke is proper airflow and the right amount of fuel. Don’t overload your firebox – start with a small, hot fire and add fuel gradually. If you see thick white smoke, your fire needs more oxygen. Open up those vents and let it breathe!
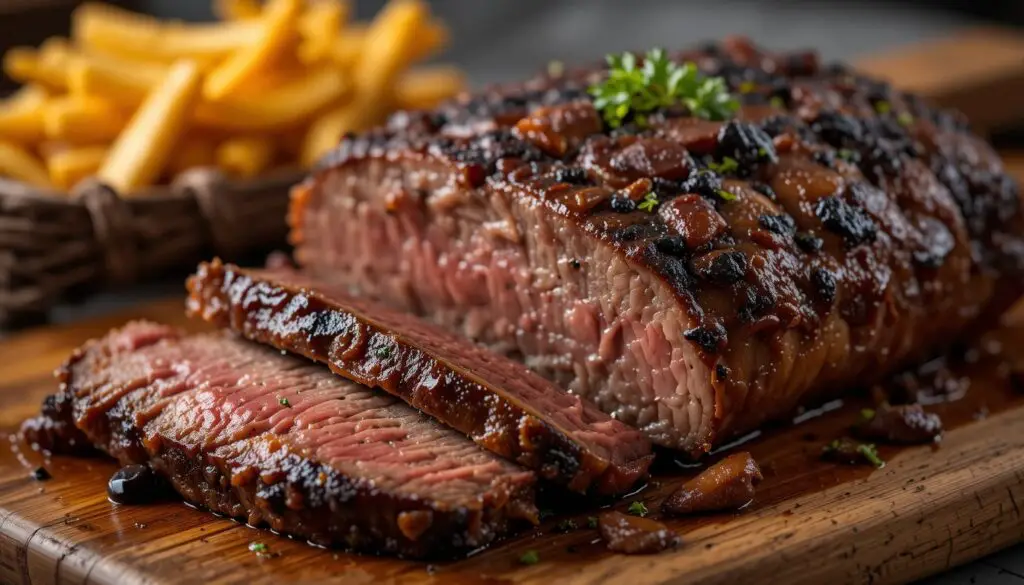
Wrapping techniques: When to use foil or butcher paper
Wrapping your meat during the smoke, often called the “Texas Crutch,” can help push through the stall (that frustrating period where the meat temperature plateaus) and retain moisture.
Foil is the traditional wrapping material. It creates a tight seal, speeding up the cooking process and keeping the meat super moist. The downside? It can soften the bark you’ve worked so hard to develop.
Butcher paper is my personal favorite. It allows a bit more breathability than foil, which helps maintain that crispy bark while still pushing through the stall. Plus, it just feels more authentic, you know?
I typically wrap when the meat hits around 165°F internal temperature. For brisket, I’ll use butcher paper to preserve that precious bark. For pork butt, I’m not as concerned about bark, so I might use foil for maximum moisture retention.
One time, I forgot to wrap a brisket entirely. It took forever to cook and dried out a bit, but the bark was incredible. Sometimes mistakes lead to delicious discoveries!
Resting and holding temperatures for perfect results
Finally, let’s talk about the importance of resting your meat. This step is crucial, folks. Don’t skip it, no matter how tempting that just-off-the-smoker meat looks.
After your meat reaches its target temperature, take it off the heat and let it rest. For large cuts like brisket or pork shoulder, I’m talking a minimum of an hour, but preferably 2-3 hours. This allows the juices to redistribute throughout the meat, resulting in a juicier, more flavorful final product.
I use a cooler (without ice, of course) to hold my meat during the rest period. Wrap the meat in butcher paper or foil, then in old towels, and place it in the cooler. It’ll stay hot for hours this way.
The target holding temperature is between 140-165°F. Below 140°F, you risk bacterial growth. Above 165°F, and the meat will continue to cook and potentially dry out.
I once got impatient and sliced into a brisket right after it came off the smoker. All those precious juices ran right out onto the cutting board. It was still tasty, but not nearly as moist as it could have been. Lesson learned: patience pays off in barbecue.
Remember, smoking large cuts is as much an art as it is a science. Don’t be afraid to experiment, learn from your mistakes, and most importantly, enjoy the process. There’s nothing quite like serving up a perfectly smoked brisket or pulled pork to a group of appreciative friends and family. Happy smoking, everyone!
Conclusion
Congratulations! You’re now armed with the knowledge to tackle those impressive large cuts like a pro. Remember, patience is key, and practice makes perfect. So fire up that smoker, grab your favorite cut of meat, and get ready to impress your friends and family with your newfound smoking skills. Who knows? You might just become the neighborhood’s go-to pitmaster in 2024!
FAQ
How long does it take to smoke a large cut of meat?
It depends on the size and type of meat, but generally, plan for 1-1.5 hours per pound at 225-250°F.What’s the best wood for smoking large cuts?
Oak, hickory, and fruit woods like apple or cherry are popular choices, depending on the meat and desired flavor profile.Should I wrap my large cuts during smoking?
Wrapping can help speed up cooking and retain moisture, but it’s a personal preference. Try both methods to see what you prefer.How do I know when my large cut is done?
Use a meat thermometer to check internal temperature. For most large cuts, aim for 195-205°F for optimal tenderness.Can I smoke large cuts on a gas grill?
Yes, with some modifications like a smoker box or pellet tube, you can achieve good results on a gas grill.
POR
- Amazing Ribs: https://amazingribs.com/technique-and-science/more-cooking-techniques/cooking-temps-when-cook-hot-fast-when-cook-low-slow/
- Serious Eats: https://www.seriouseats.com/food-lab-complete-guide-smoky-delicious-barbecue-beef-brisket
- BBQ Pit Boys: https://bbqpitboys.com/blogs/recipes/smoked-beef-roast